MaxCut Support Page
Learn how to get the most out of MaxCut with our comprehensive support articles. Find answers to common questions, step-by-step setup guides, and troubleshooting tips.
Training & Tutorials
Grooving on Panels (MaxCut 2.9.5.6 and newer)
The Grooving Dialog in MaxCut gives you full control over how grooves are defined and positioned on your panels. You can now add multiple grooves per edge, adjust their position precisely, and even control how their length is calculated.
Updated 1 week ago
Opening the Grooving Dialog
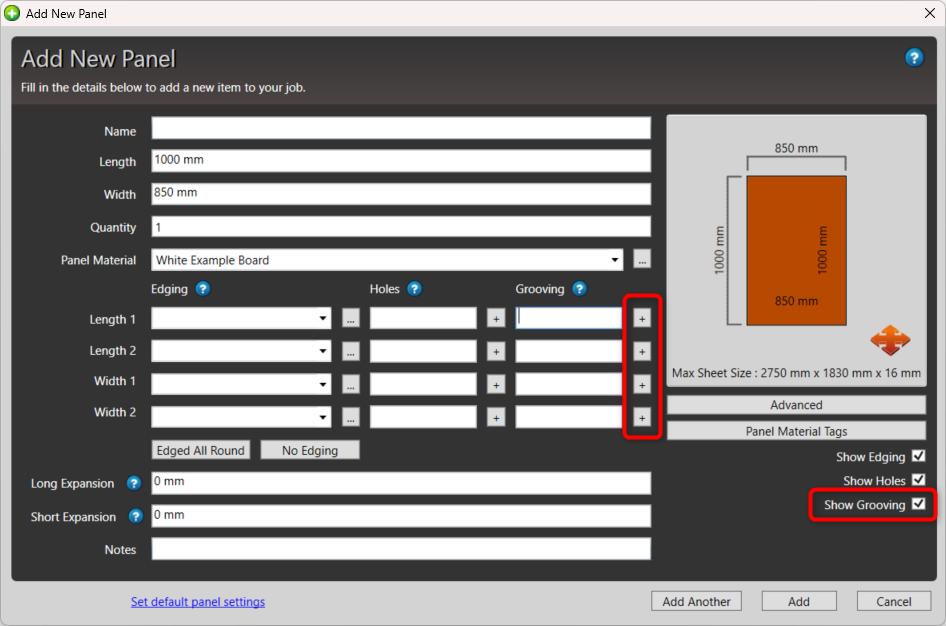
When adding or editing a panel, you’ll see four grooving fields: Length 1, Length 2, Width 1, and Width 2.
To add or edit grooves on a particular side:
Click the “+” icon next to the relevant grooving field (e.g., Length 1).
This opens the Grooving Dialog for that edge.
Understanding the Dialog
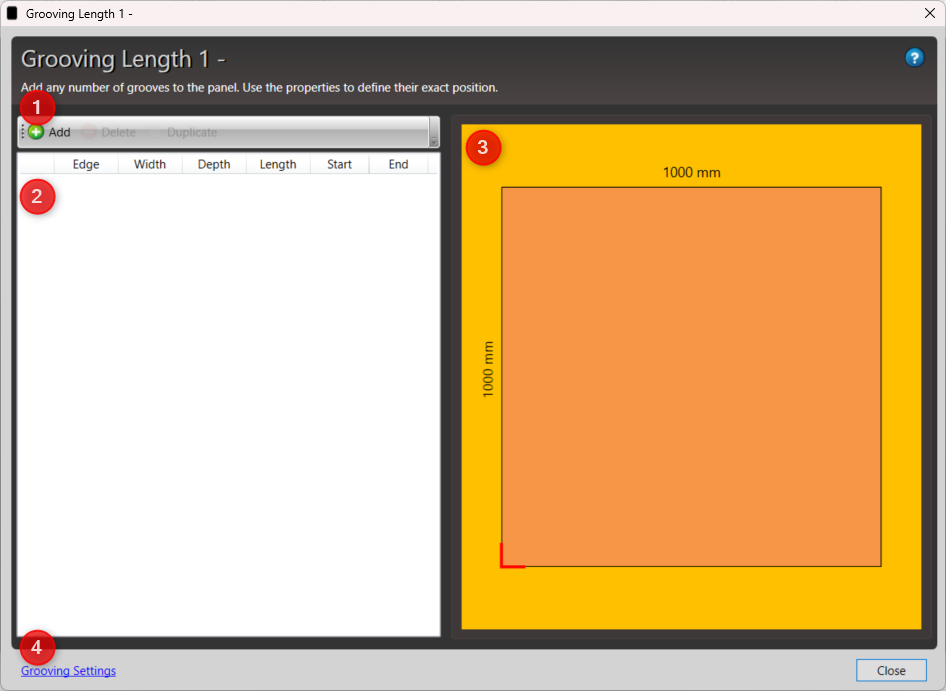
The dialog is divided into several key areas:
Toolbar – Use this to Add, Delete, or Duplicate grooves.
Groove List – Displays all grooves added for the selected side (Length 1, Length 2, Width 1, or Width 2).
Preview Area – Shows a live visual preview of your grooves.
The red corner line marks the origin (where the groove measurements start from).
Each side (Length 1, Length 2, Width 1, Width 2) has its own origin point, indicated by the red corner line.
Grooving Settings Button – Opens your default grooving settings so you can define or adjust standard groove parameters.
Adding a New Groove
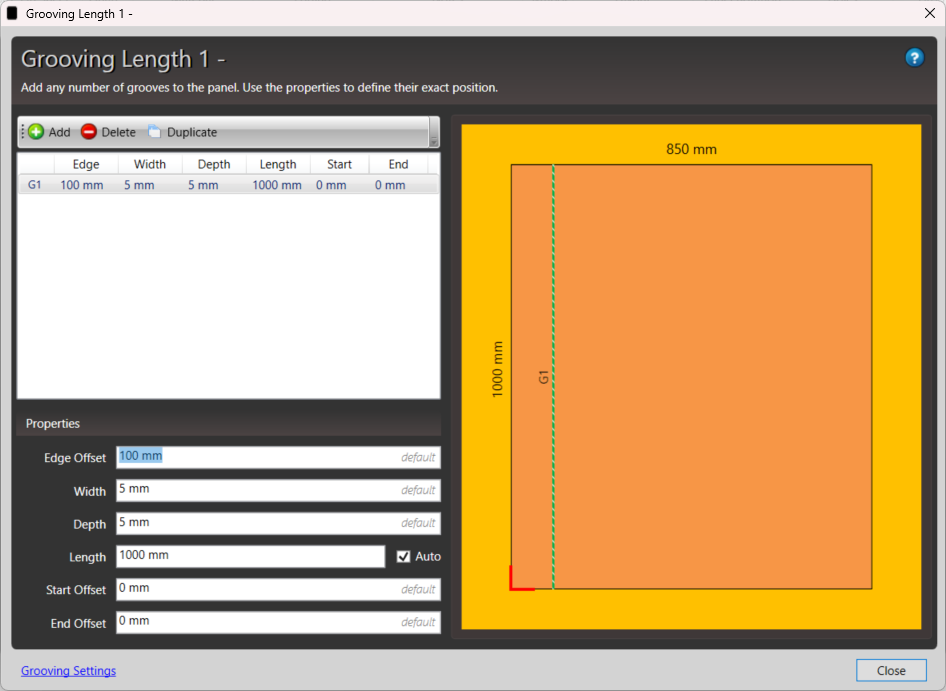
Click Add on the toolbar.
A new groove will be created using your default grooving settings.
Fields using default values will display “(default)” next to them.
Adjust the groove’s properties as needed.
Groove Properties Explained
Each groove has a set of parameters you can modify:
Property Description Edge Offset Distance from the panel’s edge (origin) to where the groove is placed. Width The physical width of the groove. Depth How deep the groove is cut into the panel. Length The total length of the groove. Auto (checkbox) When checked, MaxCut automatically calculates the groove’s length based on your start and end offsets. Start Offset Distance from the edge of the panel to where the groove begins. End Offset Distance from the opposite edge of the panel to where the groove ends.
💡 Tip:
With Start Offset and End Offset, you can now place grooves away from the edge or even extend them beyond the panel for precise control.
Saving Your Grooves
When you’re happy with your groove setup:
Click Close to return to the panel dialog.
The grooves will now appear under the relevant grooving field for that panel.
What’s New
Start and End Offsets: Grooves can now begin before the edge or extend beyond the end of a panel.
Automatic Length Calculation: Choose whether MaxCut calculates groove length automatically or define it manually.
Real-time Preview: Instantly see how your groove changes affect the panel.
See also:
Grooving on Panels (MaxCut 2.9.5.5 and older) — for details on the legacy grooving formats that remain fully supported.