MaxCut Support Page
Learn how to get the most out of MaxCut with our comprehensive support articles. Find answers to common questions, step-by-step setup guides, and troubleshooting tips.
Training & Tutorials
Sheet Sub Sizes
Updated 1 week ago
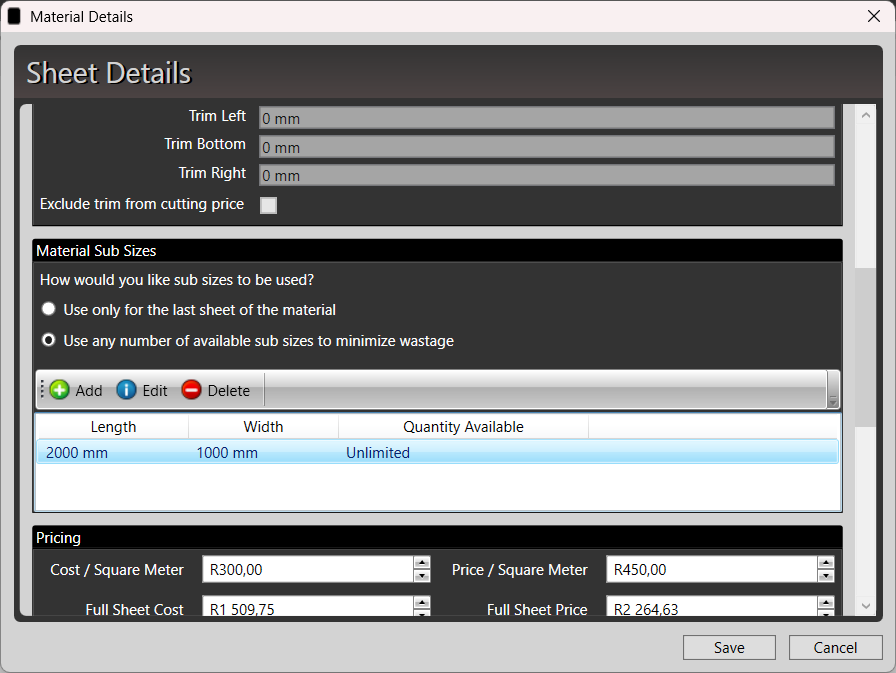
Sheet Sub Sizes is a powerful but lesser-known feature in MaxCut. It allows you to define multiple available sheet sizes for a single material. When you optimize a job using that material, MaxCut will automatically compare all the available sizes and choose the best combination to minimize wastage.
Here’s how to set it up:
1. Go to the Material Settings
In MaxCut, go to:
Manage > Sheet Materials
2. Edit the Relevant Sheet Material
- Select the material you want to add sub sizes to.
- Click Edit
3. Set the Primary Sheet Size
- In the Dimensions section of the dialog, enter the largest available sheet size (length and width).
- Fill in other required fields as needed.
4. Enable and Add Sub Sizes
Scroll down to the Material Sub Sizes section.
- Ensure the option “Use any number of available sub sizes to minimise wastage” is selected.
- Click the Add button to create a new sub size.
- Enter the length, width, and quantity available for each smaller size you want to use.
5. Optimize as Usual
Now when you optimize a job that uses this material, MaxCut will automatically evaluate all the available sizes—including the sub sizes—and select the combination that results in the least amount of waste.
You don’t need to do anything special when creating the job. Just select the material and enter the panel sizes as usual.