MaxCut Support Page
Learn how to get the most out of MaxCut with our comprehensive support articles. Find answers to common questions, step-by-step setup guides, and troubleshooting tips.
Training & Tutorials
Input Items Tab - Library Items Sidebar
The Library Items feature in MaxCut is one of the most useful ways to speed up your workflow. Instead of repeatedly creating the same panels, screws, or accessories for each job, you can group them together into reusable collections. This article explains how to use the Library Items sidebar effectively.
Updated 1 week ago
TL;DR
Library Items sidebar lets you save and reuse items across jobs.
Double-click, or drag from the sidebar.
Group common parts (e.g., panels + hardware) into reusable library items.
Reuse saved items in any new job.
Manage, duplicate, or rename items via Library > Manage Library Items.
Use the search bar to quickly filter and select items.
Keep names clear and the library organized for faster quoting and setup.
Where to Find Library Items
When you open MaxCut, you'll land on the Input Items tab. On this screen, you’ll see:
Input Items box (main area): Where all the items in your current job are listed.
Library Items sidebar (on the left): A quick-access panel for items you’ve saved.

Adding Items from the Sidebar
There are two main ways to add items:
Add Manually:
Click Add and select the type of item (e.g., panel).
Enter the item details.
Click Save, and the new panel appears in your Input Items list.
Double-Click from Library Items:
Items in the Library sidebar with an asterisk (*) are equivalent to using the Add button to add them.
Double-click an item, and it will prompt you for details to add to your job.
You can also drag and drop!
Creating a Reusable Library Item
If you often use a specific set of parts (e.g., panels, screws, legs) for a common project, you can group them into a single Library Item.
Example: Creating a “Box” Library Item
Add panels named Base, Back, and Sides.
Add any hardware you might need.
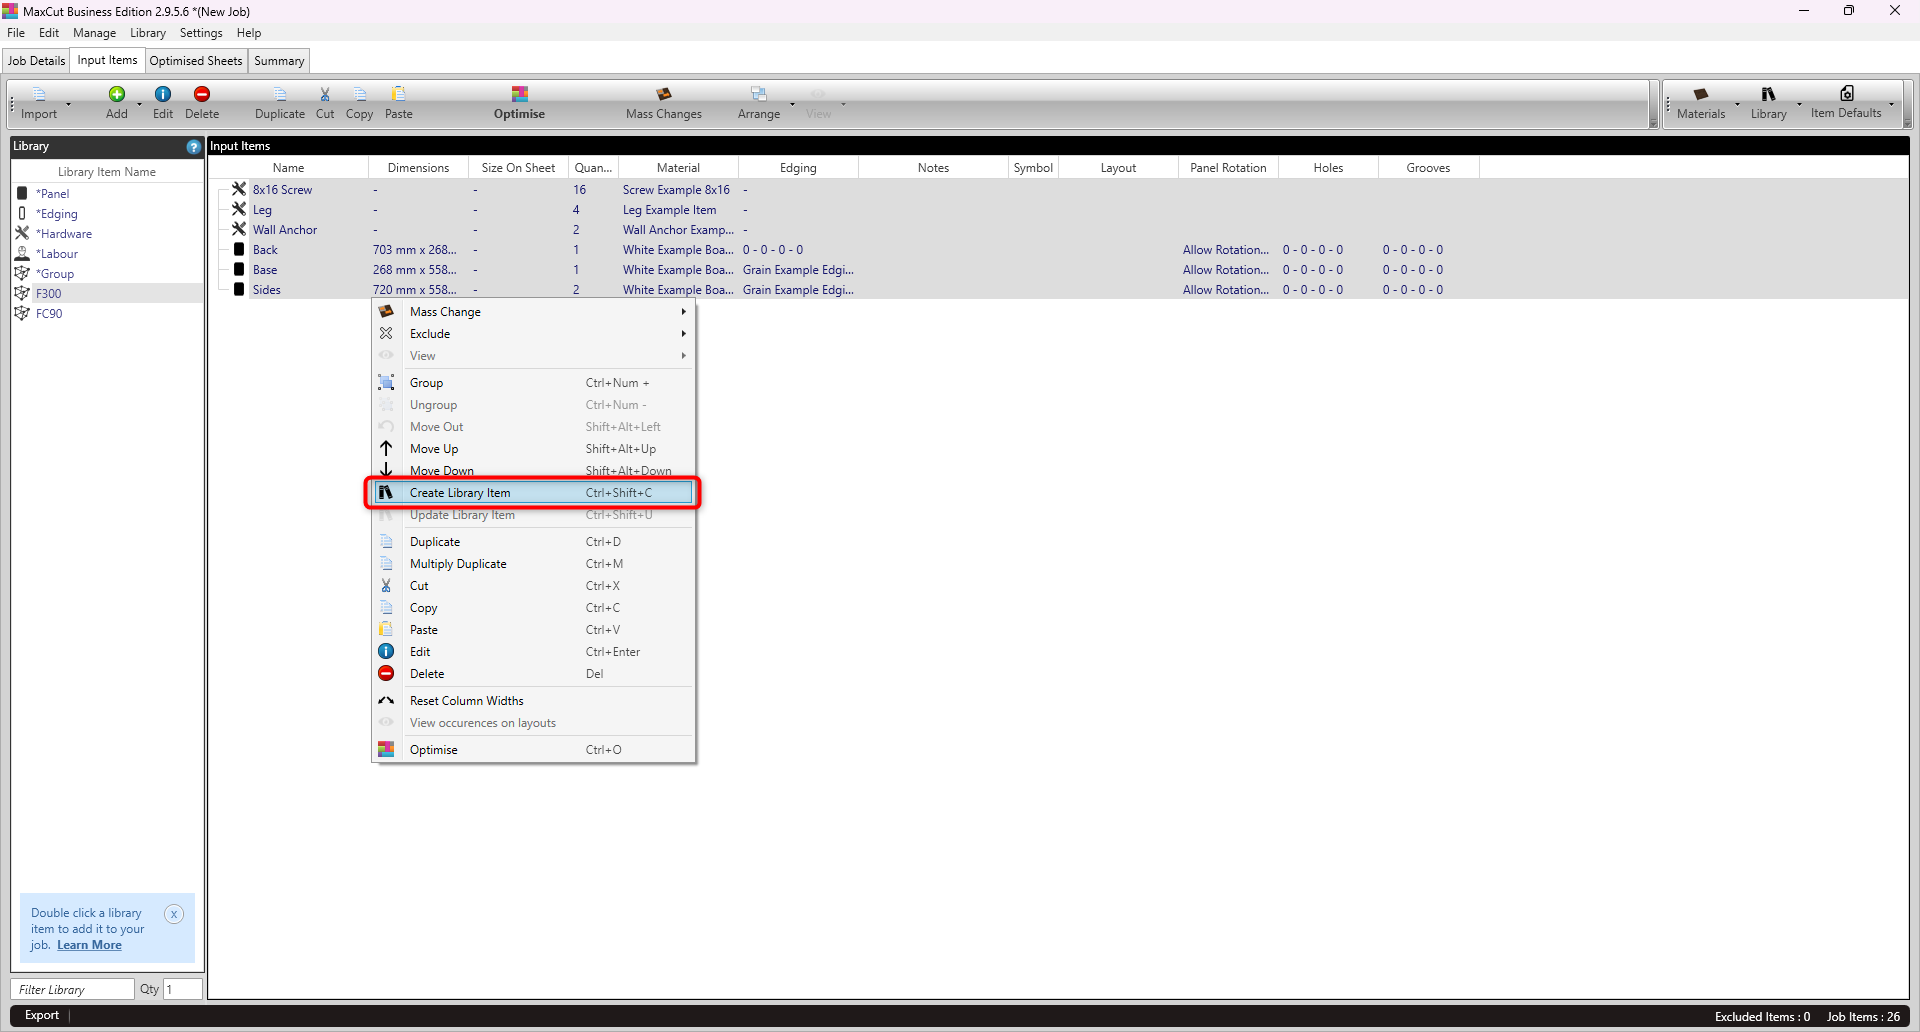
Select these items using Ctrl+Left-Click (clicking on each item individually), or Shift+Left-Click (clicking on the first and last item).
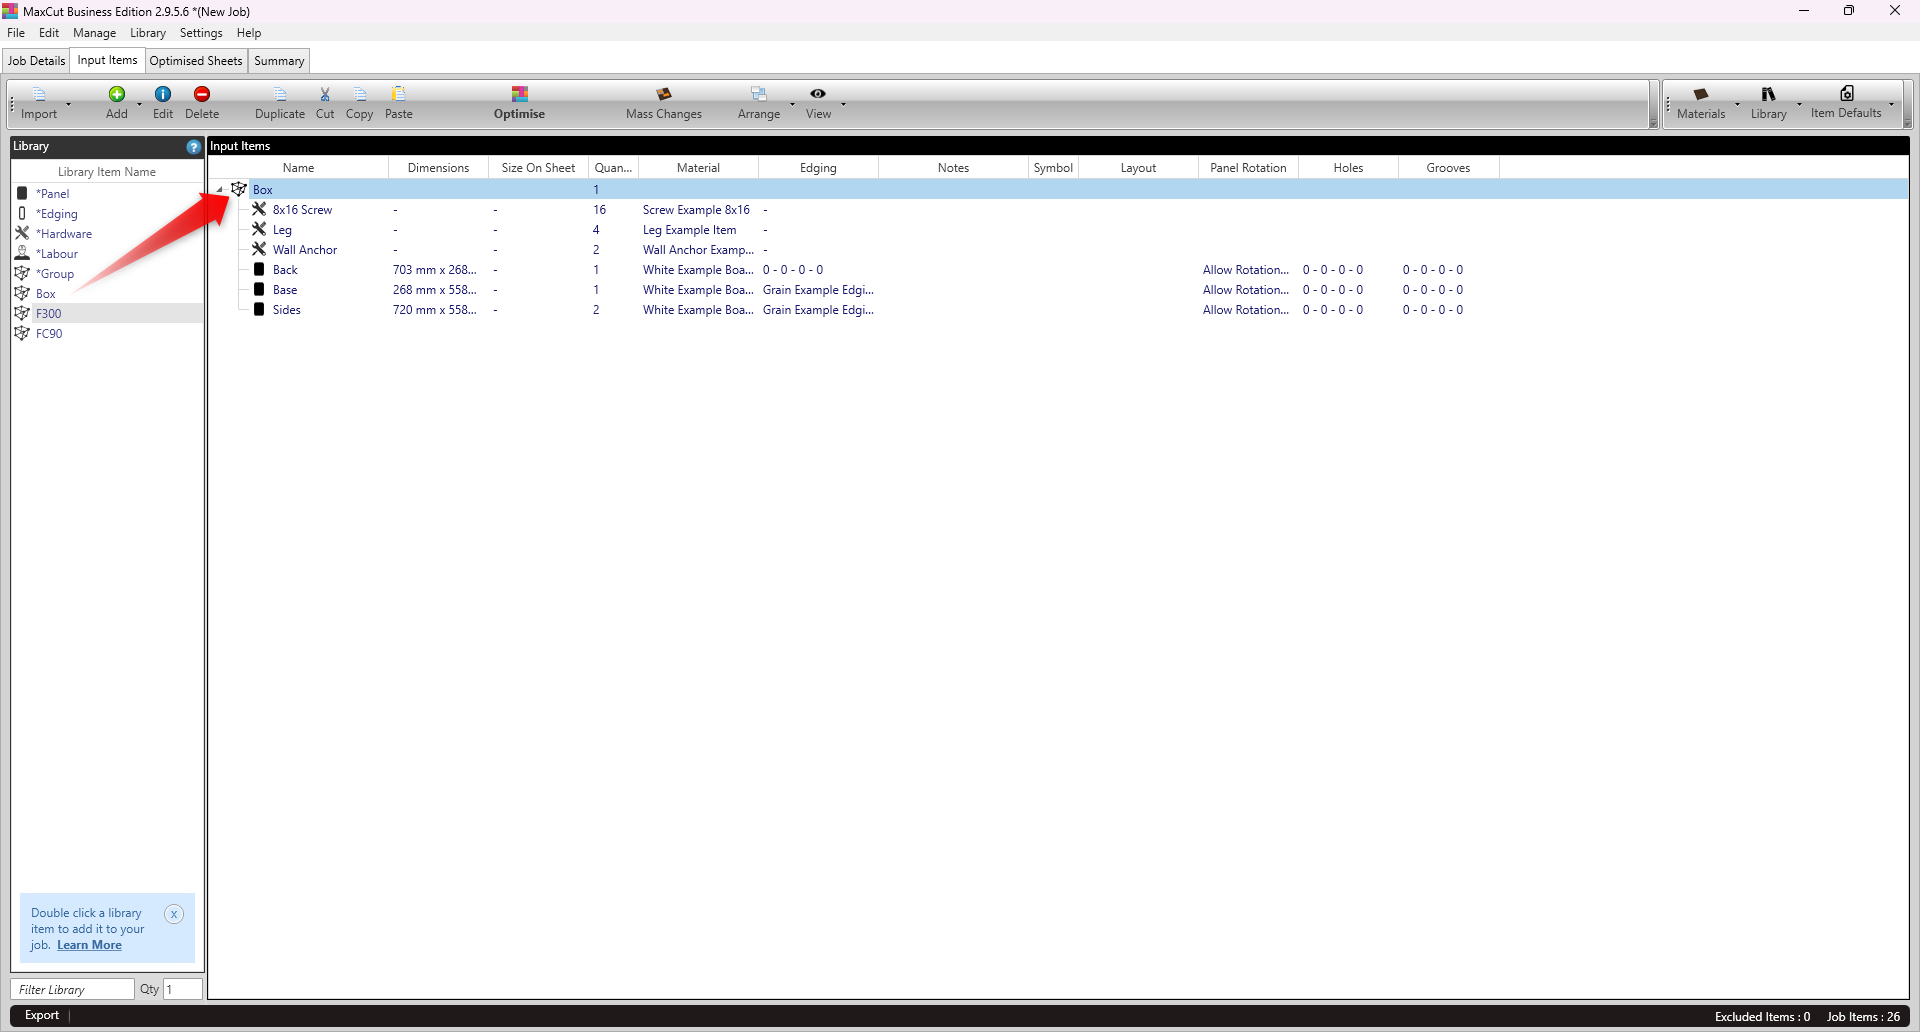
Right-click and select Create Library Item to group them into a Library Item.
Name it Box.
Now, instead of adding each part individually, you can simply add the Box item whenever you need it.
Reusing Library Items Across Jobs
One of the best parts of Library Items is that they’re saved globally:
Create a new job for a different customer.
Double-click your saved Box from the sidebar.
The grouped items are instantly added to the new job.
This makes quoting and job setup much faster.
Managing and Searching Library Items
As your list of library items grows, you can:
In the menu bar, go to Library > Manage Library Items to duplicate, rename, or adjust items.
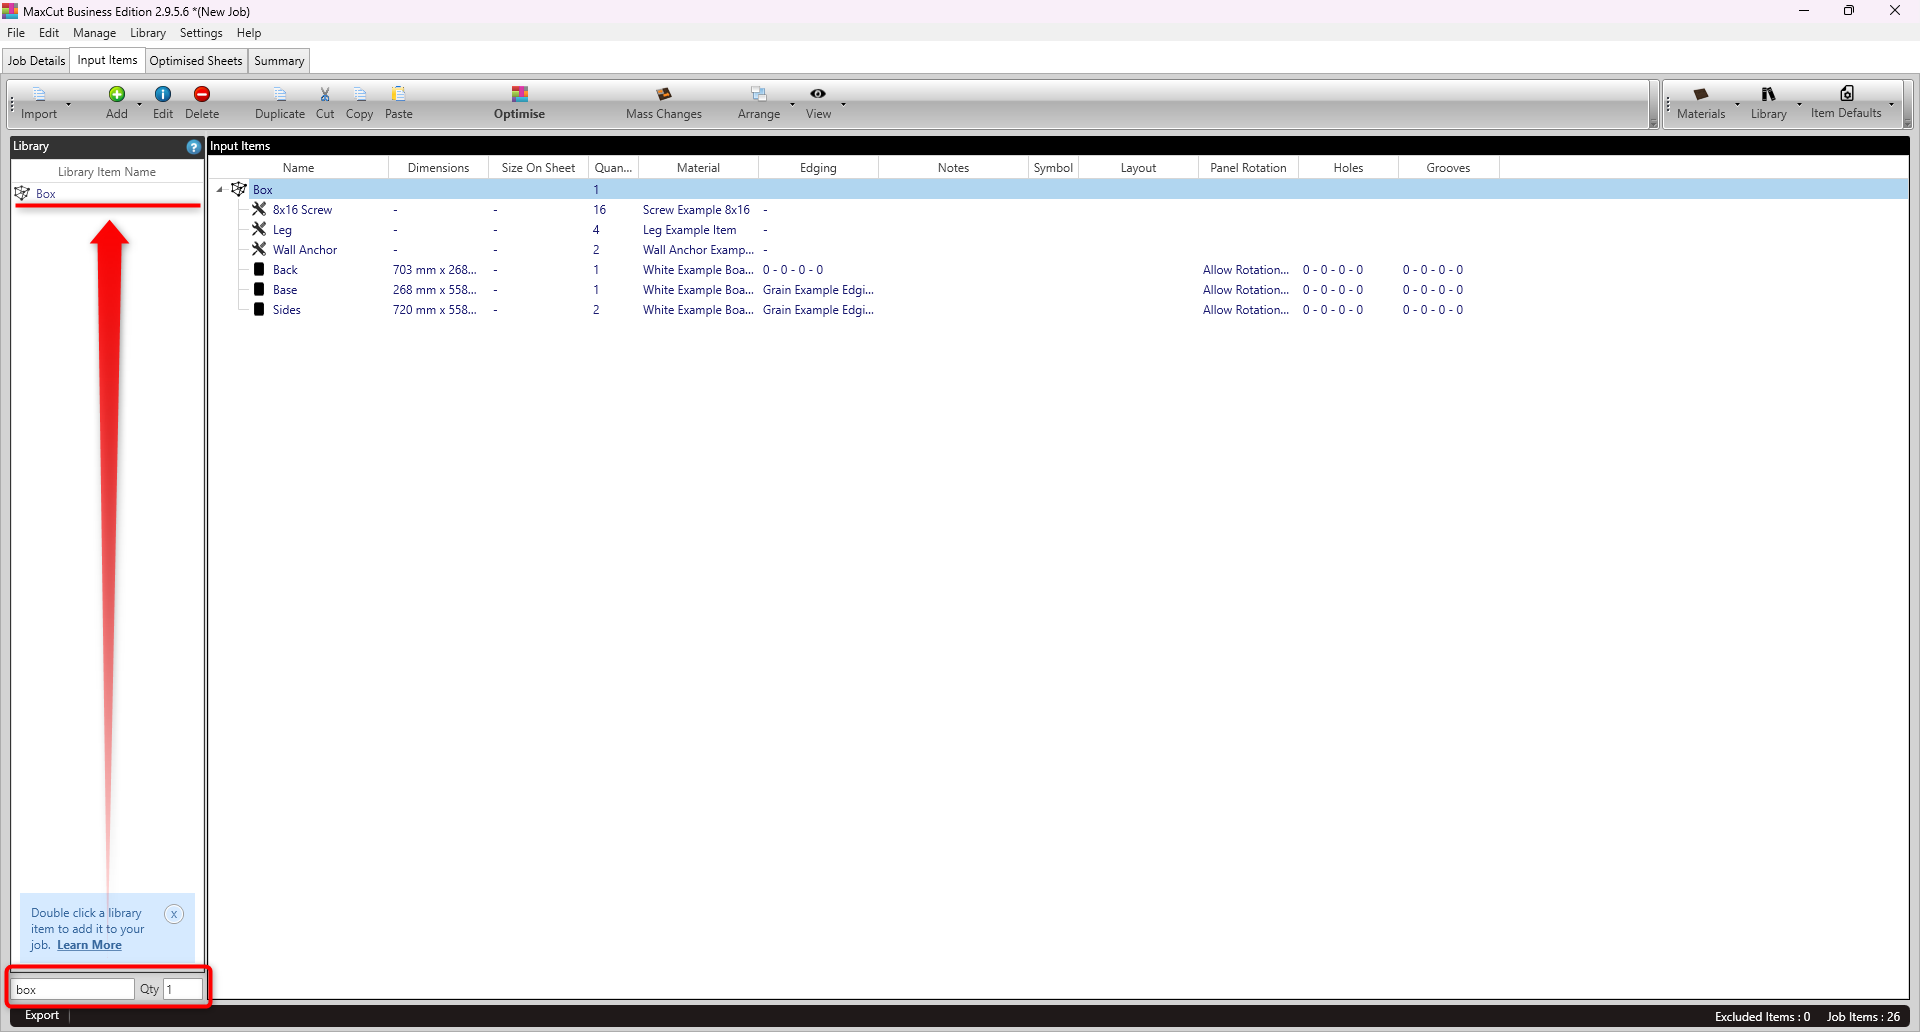
Use the search bar at the bottom of the sidebar to quickly find what you need (e.g., typing F300 to filter results).
Tips and Best Practices
Group recurring items: Create library items for common project units you build regularly.
Use clear names: Name items and groups descriptively so they’re easy to find.
Leverage search: If you have a long list of library items, type keywords into the Filter field for speed.
Keep it organized: Periodically review and tidy your library so it doesn’t get cluttered (Manage > Library Items).
By making full use of the Library Items sidebar, you can cut down on repetitive data entry, save time setting up jobs, and keep your projects consistent across customers.